

Gardening in Hawaiʻi with Tom Timmons: The KISS method of composting

I always get carried away with projects. My mother would swat me on the back of the head and say, “Keep It Simple, Stupid!,” also known as KISS. That is the trouble with much of the composting literature: it just ain’t simple.
Then there is the flip side that makes it so simple that it is stupid. Hopefully, I blend complexity with simplicity to give you the right information to build a Goldilocks’ compost pile.
Composting can take weeks or years. It all depends on the method used. Fast, three to four weeks, will not be as rich in nutrients as a slower method. However, my garden needs the compost now! Like I told the nice policeman the other day, “At my age it isn’t speeding, it’s time management.”
Composting requires four basic components: carbon, nitrogen, water and air. There is not a shortage of these in Hawaiʻi. Sun or shade makes little difference. What does make a difference is the size of the material you put into the pile. Small breaks down faster than big.
To successfully compost quickly, there needs to be an appropriate ratio of carbon rich material to nitrogen rich material. This is where the literature forgets KISS, but I won’t.
All sources agree that there should be a specific ratio of carbon to nitrogen. Well, duh, unless you paid attention in Algebra class, how do you determine this ratio? Simple, use KISS. Gather equal volumes of carbon (C) and nitrogen (N) materials: a pail of brown stuff (C) and a pail of green stuff (N).
| Carbon Rich Material (brown) | Nitrogen Rich Material (green) |
| twigs, branches, plant stems, dry leaves, paper, straw, cardboard | grass clippings, fruit and vegetable scraps, egg shells, coffee grounds, manure (no cat or dog waste) |
Sources vary on how much C and N is needed to establish the correct ratio. Some suggest a 1:1 ratio, or equal volume of C and N. Another suggests as 3:2 ratio, or for every three gallons of C, add two gallons of N. Caveat, this is the KISS method, a compost purist may scoff at the simplification. However, like my rusted-out island cruiser, I got to work just like my boss in his fancy rust-free BMW.
The compost purest will tell you that each of these materials has a specific C:N ratio that you need to consider. My KISS solution to this mathematical nightmare is the same complex formula I use to decide whether I should have one or two peanut butter and pecan cookies with one cup of coffee.
As you gather material, keep the C and N in separate piles. This is important because you are going to build a multi-decker compost sandwich. The little microorganisms are going to love you. Sounds goofy, but the microorganisms do the heavy lifting during the compost process. When you finish gathering, you should have enough material to build a really big compost sandwich. You should be able to hear the little microorganisms smacking their lips.
Remember size matters, small is best. Those branches and twigs need to be cut to approximately ½ to 2 inches in length. Rip the leaves, paper and cardboard to shreds. Pretend you are making confetti for a celebration.
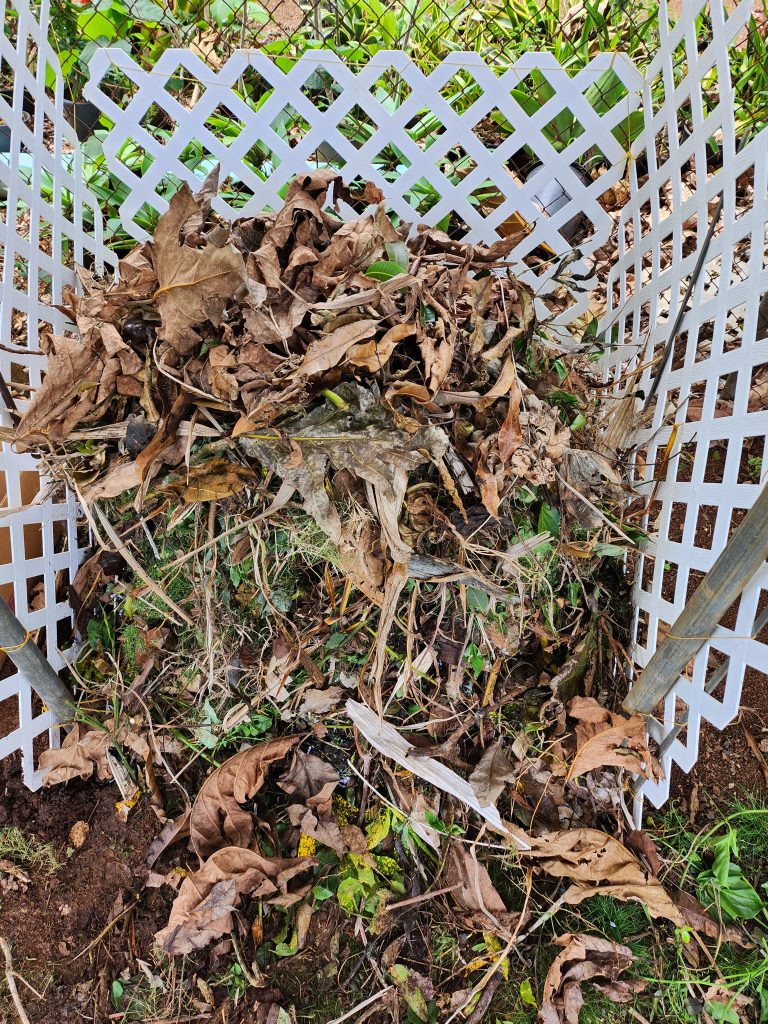
 The base layer of a compost pile should have enough loose mass to allow air to enter the bottom of the pile and be about 6 to 10 inches deep. Photo: Tom Timmons
- The N (nitrogen) layer requires 2- to 4-inches of chicken, horse or cow manure. Photo: Tom Timmons
- A compost pile. Photo: Tom Timmons
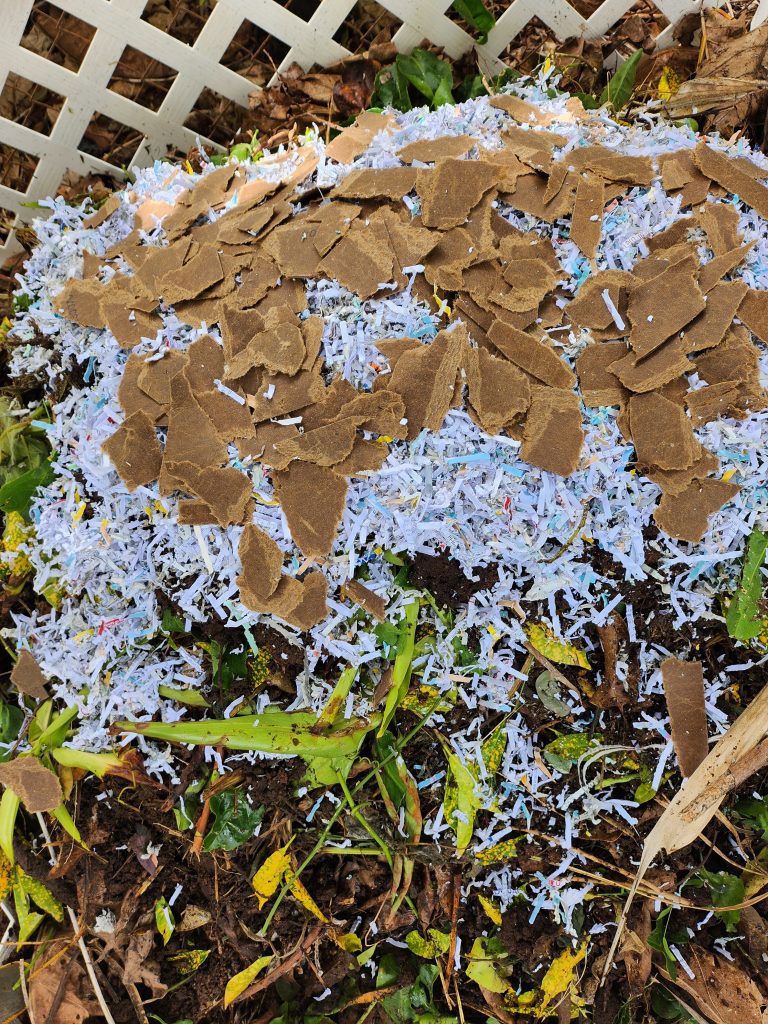
- The C (carbon) layer includes chopped sticks, dried leaves, shredded cardboard and paper and should be about 4 inches thick, completely encasing the nitrogen layer to trap in heat. Photo: Tom Timmons
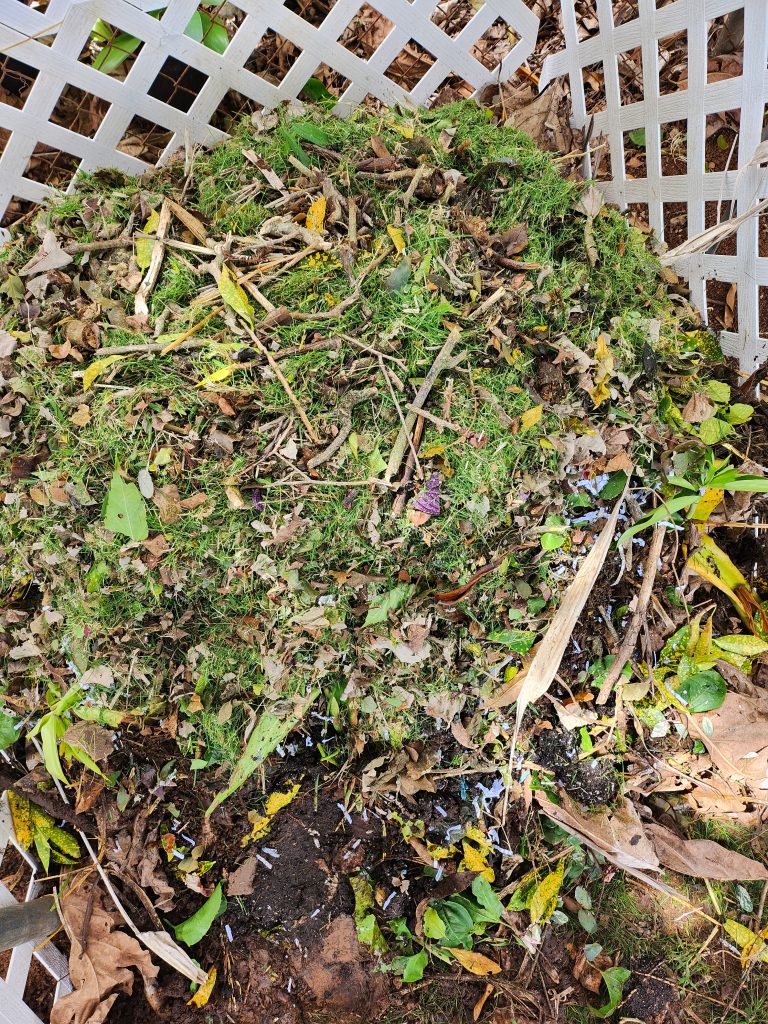
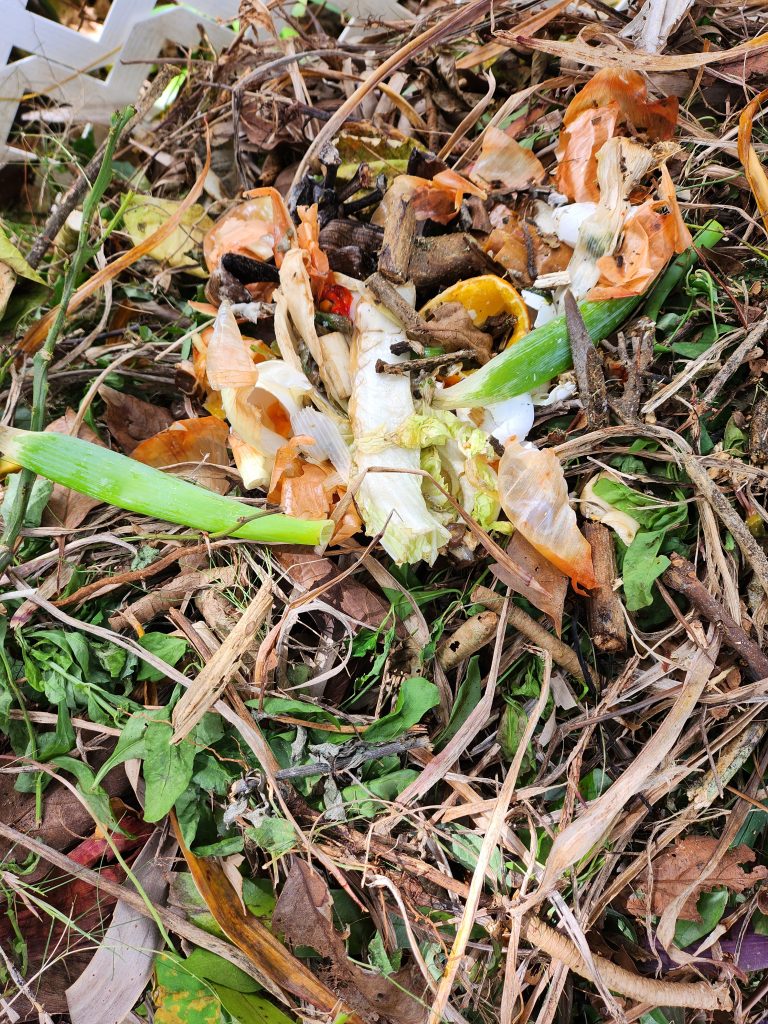
- The second nitrogen layer is a good time to use kitchen scraps, with grass clippings and green leaves tossed in. Photo: Tom Timmons
- Once the compost pile is built, let it heat thoroughly and then aerate it (or flip it). Photo: Tom Timmons


A good compost pile is engaged in vigorous aerobic exercise. It needs to huff and puff to warm up. There are more suggestions than Carter has little liver pills on how to do this. Keeping with the KISS model, the bottom of the pile is branches and sticks. Don’t use those short pieces of wood that you spent so much time and effort cutting. These will be used in the upper part of the pile to create free air space.
The size of the branches on the bottom layer is not critical. What is important is that there is enough loose mass to allow air to enter the bottom of the pile. As the compost pile warms, it will create a chimney effect that will pull the air through the entire pile.
This base layer should be approximately 6 to 10 inches deep. If you don’t have enough branches and twigs, pile dried leaves on top to get the needed depth. Cover the layer with about 1 inch of soil. Spritz the layer with water until wet, but not soggy.
The next layer is a N layer. This layer is going to get hot and help warm the entire pile. Manure is like a furnace that generates a lot of heat. A 2-to-4-inch layer of chicken, horse or cow manure should suffice. Remember: For health reasons, NO dog, cat, pig or human waste. To help reduce the odor, cover it entirely with green leaves. Your neighbors will thank you.
How fresh the manure is determines how much water you need to spritz on this layer. If it is fresh, no additional water may be needed. If it is older, wet to soften. Cover the layer with an inch of soil and spritz.
The next layer is a C layer. This is where the chopped sticks, dried leaves, shredded cardboard, and paper are used. This layer needs to be porous to allow the heat from the manure layer to rise through it. This layer is about 4 inches thick and should completely encase the underlying N layer so that every bit of heat is trapped and rises through it. Cover with a layer of soil and spritz.
The next N layer is a good place to use grass clippings and green leaves. Grass clippings tend to mat together. Mixing the green leaves and eggshells into the clippings helps reduce this problem. Also, to avoid attracting unwanted critters, don’t add meat, bones, cheese or citrus peels. Again, this layer is about 4 inches thick. Cover with a layer of soil and spritz the area. Remember, wet but not soggy.
Time for another C layer. Use more of the short twigs, shredded paper and cardboard. Cover with dirt and spritz.
The next N level is where I dump kitchen scraps. These tend to break down quickly. Feel free to toss in grass clippings and green leaves. Cover with dirt and lightly spritz. If you have done everything correctly, the pile will heat quickly. This helps keeps the rats and roaches playing pinochle in the neighbor’s garage.
By now you see the pattern: C layer, soil, N layer, soil. Continue building until you use all the material. Always finish by topping the pile with a layer of brown leaves. They are the chimney that allows rising heat to exit. They also serve another purpose. They work like shingles on your roof by keeping excess rain moisture from penetrating the pile.
Some say do, and others say don’t, cover the pile with a tarp. Because I live on a rainy part of the island, I tarp the pile. Too much water will kill the composting process. During the dry season, I need to spritz the pile. Too little water will slow the composting process.
You are probably thinking, “Ah, I’m done. I think I will binge a Netflix series.” Wrong, wrong, wrong. Get your gloves. The pile needs to be aerated, a little CPR if you like for the compost pile. Aeration is just a fancy word for flipping the pile, and it is work.
Before flipping it the first time, it is best to let the pile heat thoroughly. How often you flip the pile thereafter is a hotly debated issue. Regardless of your decision, someone is going to tell you that you are wrong. The right or wrong of your choice depends on how quickly you want finished compost. The KISS answer is that the more frequently the pile is flipped, the quicker the compost finishes. However, a quicker process sacrifices some of the nutrients that will be present in a slower composting process.
Quick composting is hard work that in time will reward you with the bounty of a luxurious garden. As Master Po might say: “Grasshopper, in the seeking of this knowledge, know patience.”
References and Additional Information.
I have included both research based and professional gardening articles for those who want to “dig deeper” into the compost.
- Compost for the Home Garden
- The Rapid Composting Method
- Composting and Mulching
- Composting Ratio: What Is the Right Number?
- 21 Best Carbon Sources for Composting
- The Essential Role of the Carbon – Nitrogen Ratio in Compostion
- Here’s What Not to Put in Compost to Avoid a Contaminated Bin
Editorʻs Note: Every other week, Big Island Now will feature a guest gardening column by Tom Timmons, a certified Master Gardener living on Kaua’i.
Other columns by Tom Timmons:
Sponsored Content